Copyright © 2000, William Weiland
Displays a brief summary of items currently in each customer's basket as they shop within a MIVA Merchant 5.x store.
You will install two modules (minibask.mvc and cim_log.mvc).
Install minibask.mvc
1) In admin, click Add Modules link (fig 2)
2) Click the file upload button
3) Browse to find the minibask.mvc file on your hard drive and upload (fig 3)
4) Click Add to add it to the domain
5) Then in admin click on the plus to the left of Stores
6) Click the plus to the left of your store name
7) Click on the word Utilities under your store (fig 9)
8) Check the box next to the Mini-basket Display
9) Click Update
10) Click Pages link to get to the User Interface (fig 4)
11) Click Items link at the top of the User Interface page (fig 5)
12) Click the Add Item button (fig 6)
13) Enter minibask for the code (fig 8)
14) Look up and scroll to the last page of items and Mini-basket Display should be at the end of the list of items
15) Select Mini-basket Display
16) Click the Add button to assign the module
17) The CIM Activity Log (cim_log.mvc) may already be in your store as it is used by many of our modules. Check under the Modules link to see if it is already there. If it is there, skip to 26. If not, then go to 18.
Install cim_log.mvc
18) Again, click Add Modules link
19) Click the file upload button
20) Browse to find the cim_log.mvc file on your hard drive and upload
21) Click Add to add it to the domain
22) Click on the Logging Configuration Link
23) Check the box next to the CIM Activity Log
24) Click Update
25) Skip to 31
Update cim_log.mvc
26) Click Modules link
27) Scroll down to CIM Activity Log and click the link
28) Click the file upload button
29) Browse to find the cim_log.mvc file on your hard drive and upload
30) Click Update to update the module
Configure the module
31) Return to the store Utility menu and click the link for Mini-basket Display to enter the configuration settings
Editing Requirements
32) Go to the editing requirements section for instructions on placing the mini-basket where you want it to be viewed
Enter data into the applicable input fields.
Title
At the top of the mini-basket the title will be listed. It can either be
text or a graphic. If you choose to enter a graphic url, put it in html
format and make the path virtual, i.e. under your merchant directory. Most
will put it in a directory like graphics/mmui/basket.gif where graphics is
a directory directly under your Merchant2 directory.
Column Headings
In the mini-basket you will have three columns. Enter the text you want for
the name of each column.
Text and Background Characteristics
The labels to the input fields are self explanatory.
Table Width
This determines how wide your mini-basket will be.
CSS Options
You can include CSS before, after and inside table tags in the mini basket.
Empty Basket Label
You can make display of the basket only occur after at least one product
is added to the basket. This option is not available if you include the
recent visit history in the mini basket. To hide empty basket display,
simply clear the input for the empty basket label. If you put text in that
input, e.g. Quantity in Basket: none, then the mini-basket will display,
even when empty.
Product Column Data
You can shorten the text in the product column to a portion of the product name.
Image After Addition
You can display an image (e.g. animated gif) to alert (draw attention to)
the customer to the fact that an item has just been added to the basket.
Delete Product
You can include text or image that when clicked, the item will be removed
from the basket.
Checkout
The link after is the amount (cost of goods) that must be in the basket before
the checkout tag in the mini-basket appears. Keep in mind that the checkout
button on the nav bar is independent of this setting. However, you can
eliminate the nav bar checkout by changing its graphic to the blank.gif (a
transparent, small image that make the button disappear). The label for
checkout can either be text or an image. If you use an image, write it as
html and make sure the graphic is virtual, i.e. below the merchant directory.
Shipping
If you want customers to be able to run a shortcut to see what their shipping
charge is going to be, either enter text or a graphics for the link.
Ship To Address
You can check the boxes for which ship to info is collected. At a minimum,
you must collect the info for all of the shipping modules you have assigned
to the store.
Sort Shipping
If you are using our Sort Shipping Plus Free Shipping module, you can
synch up that module with the mini-basket so that the methods will appear in
sorted order, e.g. lowest cost first. This sorting feature is available using the
basic basket token and if you are using the Sort Shipping Plus Free Shipping module version
5.0200 or newer, it is also available with the advanced template token. With the
version 5.0380 or newer of the Mini-basket you can also use the CBS Shipping Supermod,
if you have it, for applying shipping rules and sorting. If you are using the CBS Shipping
Supermod and want this feature in the minibasket, you have to assign the "minibaskship"
item to every page you are going to have the shipping calculator on. See
this forum thread
entry #24 about where to get the minibaskship file if it is not in your version of merchant.
Recent Visit History
You can configure how many links to show in the history. Very Important: If you use the visit history
feature you will need to clean up the history database periodically as the log will grow
very big. This could cause your site to slow down dramatically. Check the box and click update.
If you don't want history, select no display
at "Show Recently Visit Links" and erase the input "Recently Visited Title". If the clean up
times out, we have implemented a quicker method in version 5.0270 of the module. In the
admin change "Show Recently Visit Links" to No display, check the box to clean up, and then
click Update. After doing this, you can reset the "Show Recently Visit Links" selection to
your prior setting.
Screen Exclusions
Normally this is left blank unless you put the mini-basket in a global area
and do not want to show it in some screens. If not in a global area, you
control where it goes by editing the applicable page templates.
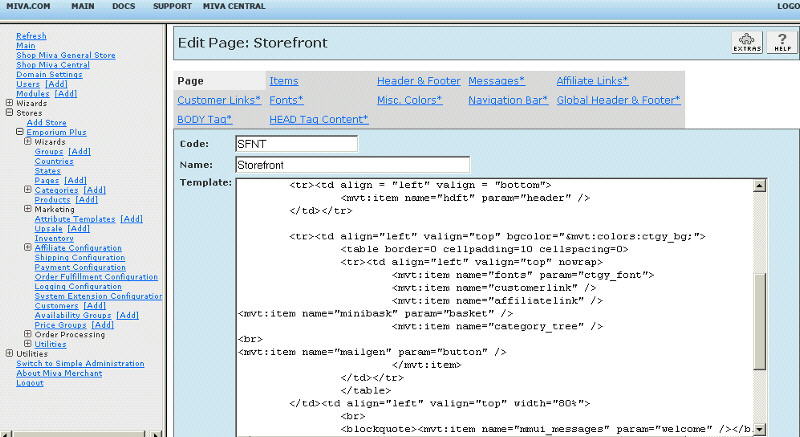
The module is called within specific template screens with render tokens. They are in the format of
<mvt:item name="itemcode" param="xxxx" />
The templates are listed at the Pages link. You will edit the template by inserting the token and clicking the Update (fig 7). Important: After adding the render token to a template page, you must click the Items link for that page, scroll down to the item name and assign it to the page (fig 8). These two steps are repeated for every page that a module's render token is used on.
This module has two basic layout tokens available <mvt:item name="minibask" param="basket" /> and <mvt:item name="minibask" param="history" /> If you include the recent visit history in the mini-basket, you will not need to use the separate history token. Just use the basket token and place it on each page you want it on.
Beginning with mini-basket module version 5.0080, we include advanced template layout control of the mini-basket. It provides template control of each section of the mini-basket. You can keep the sections together or separate them. The module creates default templates that you can edit to change the look and feel of the mini-basket. If you don't want want this level of control, use the basic layout token(s) listed above. If you want template level control, the following tokens are available:
- <mvt:item name="minibask" param="brief" /> - display just the number in the basket and total dollar value
- <mvt:item name="minibask" param="mini" /> - list the products in the basket and other charges
- <mvt:item name="minibask" param="footsteps" /> - list the customer's recently visited product pages
- <mvt:item name="minibask" param="shipping" /> - show the unsorted shipping options from your installed shipping modules (see FAQ below for sorting). To see how it works click here, then click calculate shipping.
Scroll through the page template list and decide which screens you want to show the mini-basket on. Screens sfnt, prod, and ctgy are primary screens you would expect to find the mini-basket on.
There is also a token that can be used on pages to show what the subtotal of a specific item is in the basket. As example, you can display the category page with all the products in that category. For those products that have been added to the basket, you can display the subtotal of each of them next to the listing in the category page. The token is <mvt:item name="minibask" param="individual" />
You can put the basic layout mini-basket (not advanced template layout) on a static html page using an iframe. Add a product. Then return to this static page. Refresh the static page to view the mini-basket update.
<html>
<body>
<mvt:item name="minibask" param="basket" />
</body>
</html>
If you are unfamiliar with making an iframe on a static page, here is an example of the iframe that is putting the mini-basket in this install doc which you are reading.
<iframe src="http://www.pinemporium.com/mm5/merchant.mvc?Store_Code=PE&Screen=MINI" name="mini-basket" frameborder="0" style="border:2px;border-style:solid;border-color:#ffffff;width:250px;height:300px;margin:1px" align="center">
</iframe>
Q: When I add a product to the shopping basket and click on "Shipping Options?" in the Minibasket window it says "Login in".
A: You have set your admin to hide one of the following customer fields (state, country, or zip code). Go to admin:stores and click on the store name to Edit the store. Click the tab for Customer Fields. You need to make sure none of them are hidden as some shipping modules require one, two or three of those elements. Hence, the minibasket requires that all be available if you want to use the shipping preview feature.
Q: The recent visit history is not showing up after I visit product pages.
A: Make sure you uploaded and assigned the CIM Activity Log per the instructions above.
Q: When using the advanced template layout, how can I include a delete link to remove items from the basket?
A: You can add a link like
<a href="&mvt:global:sessionurl;Screen=PROD&Product_Code=&mvt:item:code;&Store_Code=&mvta:global:Store_Code;&Action=RPRD&Basket_Line=&mvt:item:line_id;"> X</a>
Q: How do I sort the shipping options when using the advanced template layout?
A: Beginning with version 5.030 of the mini-basket module you can add a second parameter to the token to designate the sort order.
<mvt:item name="minibask" param="shipping|cost" /> - sort by cost
<mvt:item name="minibask" param="shipping|name" /> - sort by method name
<mvt:item name="minibask" param="shipping|code" /> - sort by method code
<mvt:item name="minibask" param="shipping|module" /> - sort by module name
Q: I just upgraded to Merchant 5.5 and the category column is wider when products are in the minibasket.
A: If your category column has suddenly become wider, locate the line
<td align="left" valign="top" nowrap>
at the beginning of the category column. Remove the nowrap. When Miva added the doctype to every page in Merchant, it forgot to remove the nowrap tag at the top of the category column. With that doctype, everything in the category column is no longer wrapping. "nowrap" is not a legitimate value in the "td" tag with that doctype. It produces unexpected results, e.g. much wider cells.
Q: I am using the advanced template layout for the shipping, token <mvt:item name="minibask" param="shipping" /> However, the prompts for state, zip and country do not appear to be editable.
A: If you look at the shipping advanced template you will see two occurences of the variable &mvt:minibask:shipping_prompts; I used that token to abstract some fairly complex store morph code. You can replace both instances of that variable with the following store morph code and you will have full edit capability of the shipping prompts section. If you don't want to include state and province inputs (e.g. none of your shipping modules need it) you can remove them and replace them with a single hidden input for Customer_ShipStateSelect with a value of NA. Likewise, if you only ship to the US, you can remove the country input and replace it with a hidden input for Customer_ShipCountry with a value of US.
<mvt:if expr="(standardfields:mode_state EQ 'H') OR (standardfields:mode_zip EQ 'H') OR (standardfields:mode_cntry EQ 'H')">
Login First <mvt:exit />
</mvt:if>
<form method="post" action="&mvt:global:sessionurl;">
<input type="hidden" name="Store_Code" value="&mvt:Store:code;">
<input type="hidden" name="Action" value="NEW">
<input type="hidden" name="ShowShip" value="1">
<mvt:if expr="g.Screen EQ 'CTGY'">
<input type="hidden" name="Screen" value="CTGY">
<input type="hidden" name="Category_Code" value="&mvte:global:Category_Code;">
<input type="hidden" name="Offset" value="&mvte:global:Offset;">
<mvt:else>
<mvt:if expr="g.Screen CIN 'PLST|SRCH|MINI|BASK'">
<input type="hidden" name="Screen" value="&mvte:global:Screen;">
<input type="hidden" name="Offset" value="&mvte:global:Offset;">
<mvt:else>
<mvt:if expr="g.Screen EQ 'PROD'">
<input type="hidden" name="Screen" value="PROD">
<input type="hidden" name="Product_Code" value="&mvte:global:Product_Code;">
<mvt:else>
<input type="hidden" name="Screen" value="SFNT">
</mvt:if>
</mvt:if>
</mvt:if>
<b>
Ship To:</b>
<br />
State/Province: <br />
<select name="Customer_ShipStateSelect">
<mvt:foreach iterator="state" array="global:states">
<mvt:if expr="l.settings:state:code EQ g.Customer_ShipStateSelect">
<option value="&mvt:state:code;" selected>
&mvte:state:name;</option>
<mvt:else>
<option value="&mvt:state:code;">
&mvte:state:name;</option>
</mvt:if>
</mvt:foreach>
</select>
<br />
Other State/Province:<br />
<input type="text" name="Customer_ShipState" size=15 value="&mvte:global:Customer_ShipState;">
<br />
ZIP/Postal Code:<br />
<input type="text" name="Customer_ShipZip" size=10 value="&mvte:global:Customer_ShipZip;">
<br />
Country:<br />
<select name="Customer_ShipCountry">
<option value="">
Select One</option>
<mvt:foreach iterator="country" array="global:storecountries">
<mvt:if expr="l.settings:country:alpha EQ g.Customer_ShipCountry">
<option value="&mvt:country:alpha;" selected>
&mvte:country:name;</option>
<mvt:else>
<mvt:if expr="l.settings:country:alpha EQ g.Store:country">
<option value="&mvt:country:alpha;" selected>
&mvte:country:name;</option>
<mvt:else>
<option value="&mvt:country:alpha;">
&mvte:country:name;</option>
</mvt:if>
</mvt:if>
</mvt:foreach>
</select>
<br />
<input type="submit" value="Update">
</form>
Still have a question?